Why Cardio Dance Works for Beginners (And What Most Instructors Get Wrong)
When I first tried a cardio dance class, I lasted about four minutes before I froze. The instructor was shouting cues I could not follow, the music was fast, and I kept stepping on my own feet. I thought I had no rhythm. But the real problem was that nobody had taught me the moves first. They expected me to learn by osmosis. That is the biggest gap in most beginner-friendly cardio dance content: it assumes you can already feel the beat and translate that into movement.
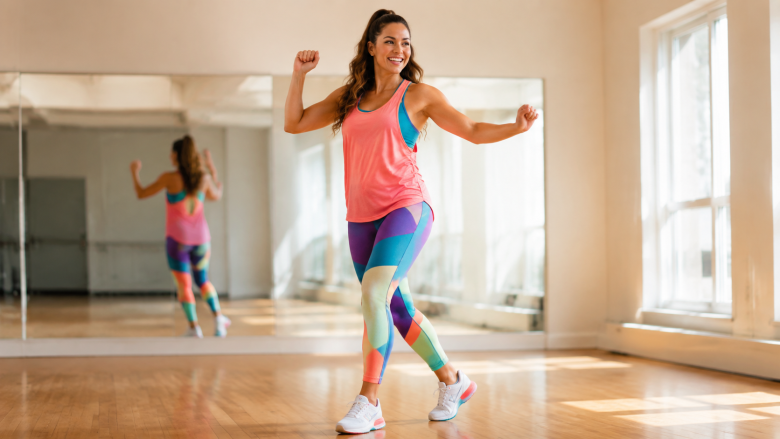
Cardio dance is simply moving your body to music in a way that raises your heart rate. It is not a secret formula, and you do not need any special talent. What you need is a clear, step-by-step introduction to the building blocks. This article is that introduction. By the end, you will have a printable move glossary, a playlist sorted by beats per minute (BPM), and a four-week plan to build confidence and consistency. You will also learn how to adapt every move for your body, whether you are recovering from injury, carrying extra weight, or just feeling self-conscious.
If you are wondering about the calorie side of things, our Dance Calories Per 25 Minutes Calculator can give you a personalized estimate. But weight loss is not the only reason to dance. The mental shift from "I look ridiculous" to "I am having fun" is the real victory.
Is Cardio Dance the Same as Zumba? (The Honest Comparison)
This question comes up constantly, and the answer is both yes and no. Zumba is a specific branded program that combines Latin and international music with choreographed routines. Cardio dance is the broader category: any aerobic movement set to music, from hip-hop to oldies to Bollywood. Zumba classes often move at a fast pace with complicated transitions. A truly beginner-friendly cardio dance session, on the other hand, should slow down and teach the choreography before adding the music.
For a beginner, the biggest difference is the learning curve. In a typical Zumba class, you might be expected to learn eight to ten moves in a single song, with no time to practice them separately. That is overwhelming. In a well-designed cardio dance workout for beginners, you will learn three moves per segment, drill them at half speed, and only then combine them into a short routine. This is the approach I use in the four-week plan below.
Another difference: Zumba tends to rely on high-impact moves like jumps and kicks. Cardio dance can be low-impact by design. If you have knee issues or are just starting out, you can do every move with one foot on the floor. That is a safety feature most mainstream classes ignore.
What Are Some Easy Aerobics Dance Moves? (And the Easiest Dance for Beginners)
If you are brand new, the easiest dance form is simply walking with rhythm. From there, you add a few basic moves. Here are the ones I teach in every beginner session. They are the foundation of almost every cardio dance routine, and they require no coordination beyond what you already use to walk.
- Step-Touch: Step right foot out to the side, then bring your left foot to meet it. Repeat the other way. That is it. Keep your arms relaxed or swing them naturally. This move is the basis for many lateral patterns.
- Knee Lifts: Lift your right knee toward your chest, then lower it. Alternate sides. You can do it without jumping by keeping the standing foot flat. Add a tiny bounce if you want more intensity.
- Side Steps with a Tap: Step wide to the right, then tap your left foot next to your right. Step back to the left, tap the right. This teaches weight transfer and timing.
- Grapevine: Step right foot to the side, cross left foot behind right, step right again, then tap left foot next to right. Practice it slowly until you can do it without thinking.
- March in Place: Simply lift your knees as you march, matching the beat. Add arm pumps (punching the air) for more calorie burn.
These five moves are the easiest dance for beginners because they use natural walking patterns. Most people can learn them in five minutes of focused practice. The trick is to practice them without music first, then with a slow beat (around 100-110 BPM), and only then speed up.
Is Cardio Dance Good for Weight Loss? (What the Numbers Say)
Yes, but with an honest caveat: it depends on how consistently you move and how hard you work. A 150-pound person doing moderate-intensity cardio dance for 30 minutes burns roughly 150-200 calories. That is similar to brisk walking, but way more fun. The real advantage is that you are more likely to stick with something you enjoy. Weight loss is not about one workout; it is about the cumulative effect of many workouts over weeks and months.
I have seen beginners lose 10-15 pounds in eight weeks simply by dancing three times per week and making small adjustments to their eating habits. For a deeper dive into the nutrition side, check out our Beginner Guide to Simple Mindful Eating. Combining dance with mindful eating is a sustainable approach, not a crash diet.
One thing nobody tells you about cardio dance and weight loss: the first two weeks may not show much change on the scale. Your body is adapting to a new movement pattern, and you might even feel a little sore or puffy. That is normal. Stick with it, and the results will follow.
The 8-Minute Teaching Segments: Learn 3 Moves, Then Combine
Here is the core structure of my progressive approach. Each segment is designed to be repeated until you feel comfortable, then combined with the previous segment. You can do this at home with a clear floor space about six feet by six feet, wearing shoes with flat, flexible soles (like cross-trainers or dance sneakers). Avoid running shoes with thick heels, because they mess with your balance on lateral moves.
Segment 1: Step-Touch, Knee Lifts, Side Steps with Tap
Start with a warm-up of gentle marching for one minute. Then practice each move individually for one minute. Step-touch: eight reps to the right, eight to the left. Then knee lifts: eight on each side. Then side steps with tap: eight right, eight left. Repeat the cycle once. Now try to link them: step-touch for four counts, knee lifts for four counts, side steps for four counts. Repeat until you can flow without pausing. This takes most people three to four repetitions.
Segment 2: Grapevine, March in Place with Arm Pumps, and a New Move: Heel Digs
Heel digs: extend your right heel forward, tap the floor, then bring it back. Alternate sides. Practice grapevine at half speed. Then march in place with arm pumps (punch forward alternately). Now combine: grapevine for four counts, heel digs for four counts, march for four counts. Finally, connect segment 1 and segment 2 into a 30-second routine. If you mess up the transition, pause and go back to the individual moves. That is the point of this method.
Segment 3: Adding a Half-Turn and a Simple Jump (Optional)
Once you are comfortable with the first six moves, you can add a quarter-turn. During the step-touch, instead of stepping side to side, turn your body 90 degrees to the right for two reps, then 90 degrees to the left. This teaches spatial awareness. Then add a simple jump: instead of a knee lift, do a small hop as you lift your knee (both feet leave the ground). This is optional. If you have joint concerns, keep using the low-impact version. The thing nobody tells you about jumping in dance: it is not necessary for a good workout. You can get your heart rate up just as high with fast walking and arm movements.
Now combine all three segments into a full routine. It should last about 90 seconds. Do it three times, with a 30-second rest between repeats. That is your first mini-workout: 8 minutes of learning, 4 minutes of practice, and 2 minutes of cool-down (stretching your calves, quads, and shoulders).
Printable Move Glossary and Playlist by BPM
To make this truly practical, here is a reference list of the moves and their key cues. You can copy it into a notebook or print it out.
- Step-Touch - Step side, bring feet together. Keep knees soft. Arms can swing or stay at sides.
- Knee Lift - Lift knee to hip height (or lower if needed). Stand tall, engage core. Low-impact version: keep foot on ground, just lift heel.
- Side Step with Tap - Step wide, tap opposite foot. Transfer weight fully. Tap lightly.
- Grapevine - Step, cross behind, step, tap. Practice with feet close together to avoid tripping.
- March in Place - Lift knees alternately. Add arm pumps, overhead presses, or side punches for intensity.
- Heel Dig - Extend heel forward, tap, return. Keep standing leg slightly bent.
- Quarter-Turn - On step-touch, pivot on ball of foot. Look over your shoulder before turning to avoid dizziness.
- Optional Jump - Small hop replacing knee lift. Land softly with bent knees.
For music, start with songs around 100-110 BPM. Some good examples: "Walking on Sunshine" by Katrina and the Waves (110 BPM), "Dancing Queen" by ABBA (100 BPM), "I Will Survive" by Gloria Gaynor (116 BPM). As you get comfortable, move to 120-130 BPM: "Uptown Funk" by Mark Ronson (115 BPM, close), "Can't Stop the Feeling!" by Justin Timberlake (113 BPM). Avoid anything above 130 BPM until you can do the entire routine without stopping. The beat is your guide, not your enemy. If you cannot hear the beat clearly, search for "100 BPM dance music" on YouTube or Spotify.
4-Week Confidence Plan: From Hesitant to Joyful
This plan is built on the progressive segments above. Each week adds one new skill and increases the workout length slightly. You can repeat any week if you need more time. Consistency beats intensity every time.
Week 1: Foundation
Do the 8-minute learning session (Segment 1) every other day. Practice the three moves until you can do them without thinking. On rest days, just listen to music and tap your feet. No pressure. Aim for three sessions total.
Week 2: Combine and Repeat
Add Segment 2. Do the combined routine (Segments 1+2) twice per session. Each session should last about 12 minutes. Add a 30-second rest between repeats. Increase to four sessions this week.
Week 3: Add Variety and a Turn
Incorporate Segment 3, including the optional quarter-turn. Do the full three-segment routine twice. Your session is now about 15 minutes. Experiment with one new song from your playlist. This week, also try a short dance break during the day: put on a song and do only the moves you know for 2 minutes. This builds the habit of dancing outside of a formal workout.
Week 4: Flow and Fun
Now you have a 90-second routine. Repeat it four times with minimal rest. That is a 6-minute continuous dance. Add a 2-minute warm-up and 2-minute cool-down, and you have a 10-minute session. This week, aim for six sessions. On the seventh day, just dance to your favorite song without any structure. That is the point: you have built enough confidence to move freely.
After week 4, you can move on to longer routines or try a friend's playlist. But remember: you can always return to the individual moves if you feel lost. That is not a step back; it is a refresher.
Safety, Space, and Shoes: What Beginners Overlook
Most people think they need a gym or a studio. You do not. You need a clear floor area where you can step sideways without hitting furniture. A rug on a hard floor can be dangerous because it slides. Dance on a non-slip surface, like a wood floor, vinyl, or a yoga mat placed on carpet. If you have joint pain, consider a mat with extra cushioning, but be careful not to twist your ankle on a thick mat.
Shoes are a common mistake. I used to dance in old running shoes, and my knees ached after ten minutes. The thick heel altered my posture. The best shoes for cardio dance are cross-trainers or dance sneakers with a flat sole and good lateral support. If you are dancing on a carpet, you might be fine with bare feet or socks, but be aware that socks can slip on wood floors. Look for dance socks with grip dots on the bottom.
Hydration: keep a water bottle nearby. You will sweat more than you expect. Take breaks. If you feel dizzy, sit down and put your head between your knees. This is more common in beginners who hold their breath while concentrating on moves. Remember to breathe naturally. A good cue: exhale when you step or lift, inhale when you return to center.
If you are older or have not exercised in a while, start with the low-impact versions of every move. Keep your knees softly bent at all times. Do not lock your joints. And listen to your body: a muscle stretch is fine, but a sharp pain is a signal to stop. I have seen beginners push through pain and then sit out for weeks. Better to do five minutes properly than twenty minutes with bad form.
Building Consistency: The Mental Game
The hardest part of any new fitness habit is not the first week; it is the third week, when the novelty wears off. That is when you need a strategy. One thing that works for me is to pair dancing with another activity you already do. For example, dance while your coffee brews in the morning. Or right after you brush your teeth at night. Keep it short. Even 5 minutes counts. For a deeper look at building sustainable habits, our Beginner's Guide to Natural Ways for Better Rest discusses how sleep and consistency go hand in hand. When you are rested, you are more likely to show up.
Another mental trick: do not judge your dancing. You are not performing for an audience. You are moving your body because it feels good. If you make a mistake, laugh it off and keep going. The most confident dancers are the ones who embrace imperfection. I still mess up the grapevine after years of practice.
Finally, consider inviting a friend, even if it is virtual. Having someone to share a silly video of your routine can break the tension. You can also use our 10-Minute Beginner Yoga Flow as a cool-down after your dance session. Yoga complements dance by improving flexibility and balance, which reduces injury risk.
Common Questions Beginners Ask (Answered Naturally)
You might still wonder: what if I cannot keep up with the beat? That is normal. Your brain is processing new movement patterns. Clap along to the music first, then march, then add the dance moves. The rhythm will come. Also, most people do not realize that you can dance off-beat and still get a great workout. The music is a guide, not a rule.
Another question: how long until I see improvement? In my experience, most beginners feel a noticeable difference in coordination after two weeks of consistent practice. You will still make mistakes, but you will recover faster. By week four, you will be able to follow a new routine within a few minutes. That is the goal: not perfection, but adaptability.
Cardio dance is not a magic bullet. It is a joyful, sustainable form of movement that works for almost everyone. The key is to start where you are, learn the moves first, and then let the music carry you. That is the approach I wish I had when I first stepped into a class. Now you have it.